
Tsubaki.3 Prompts in Action
Walk a commercial-grade workflow with the official MIO band project — character design sheets, a magazine key visual, live CGs, a serialized manga, and anniversary art, with full prompts and section-by-section breakdowns.
This page shows you how to produce a full set of commercial-quality output with Tsubaki.3. Using the official "MIO band" project as the example, we walk through the actual workflow:
- Character design sheets — establish the characters first and produce reusable "character files"
- Three-member magazine cover — put the character files onto a key visual
- Live CG — walk the same cast into a scene
- Serialized manga — script first, then generate a continuous story page by page
- Anniversary art — new outfits plus multi-pose sheets for long-running projects
Every step comes with the full prompt and a section-by-section breakdown. Write the character file well once, and every image afterward reuses it — exactly the consistency a commercial project needs most.
Every example on this page is a prompt written by hand, entirely in English, with the Prompt Helper off (PH OFF) — the recommended approach when you need precise control over layout and text. For everyday generation, writing in your own language with the Prompt Helper on is still the easiest route.
General Principles
Before writing long prompts, keep four things in mind:
- Use English wherever you can — recognition is most accurate.
- Write in a fixed order — recommended structure:
| Order | Section | What to write |
|---|---|---|
| ① | Style and effects | Art style, lighting feel, contrast, camera angle, aperture, blur, and so on |
| ② | Content summary | One sentence on what the image is, where it's used, and who's in it |
| ③ | Character description | Each character's look, pose, and position in the frame |
| ④ | Text design | Titles, taglines, and info to embed in the image (skip if there's no text) |
| ⑤ | Layout description | Background color, negative space, decorative rules, and other graphic needs (optional) |
- Always name your characters when there's more than one — like
Mio-A,Mio-B,Mio-C, so the model can match looks and positions to the right person. - Use a fixed format for embedded text — recommended:
title:「…」orchara name:「…」. Don't write the label in the same language as the text itself (for example, Chinese copy with a Chinese 「標題:」 label) — the label tends to get rendered into the image.
Before You Start: Build the World
The foundation of a commercial project isn't the art — it's the story. The official team wrote a full narrative setting for the MIO band, and every image afterward draws its character personalities, costume language, and scene choices from it:
MIO is a three-member new-generation idol band. The three look almost identical — short white hair, pale pink gradients, purple eyes, cat ears and tails — and this near-uniform visual identity is the group's most striking signature. But once they take the stage, they reveal completely different personalities:
- Mio-A (vocals / center): cheerful and approachable, occasionally pushes herself too hard, terrified that her own mistakes will drag the team down
- Mio-B (lead guitar): quiet and composed, black-and-purple punk, secretly the first to notice the other two's moods
- Mio-C (bass): free-spirited and playful, loves a joke, yet holds down the band's steadiest rhythm
For MIO, the goal isn't to become the most popular idols — it's to find the sound only these three can create. "Three people who look so alike, and yet not one of them could ever replace another."
The setting doesn't need to be long, but it should be able to answer "what would this character do when X happens." Write one good version, and let AI handle the translations into other languages.
Step 1: Character Design Sheets
A commercial project doesn't start with finished art — it starts with character files. Write a character description for each of the three members — features, costume, personality positioning — and generate three standing-art designs directly:


Once the direction is set, expand a single character into a complete design sheet — standing art, turnaround, expressions, head angles, accessory details, and a color palette, all in one generation. This sheet then serves as the "master reference" for the entire project:

The key to a design sheet is writing "what must appear on the page" as a checklist. The full prompt is below, with colors mapping to the sections:
- Style (purple) — a design sheet wants flat colors and no lighting, so write the style section in reverse
- Scene (orange) — the content summary: a design piece, 2:1 landscape, white background, single character
- Detail (pink) —
MANDATORY PAGE CONTENT:names every page module; the second half specs each module under uppercase labels - Character (blue) —
CHARACTER:/COSTUME:sections for features and styling — this is the "character file" you'll reuse over and over - Action (green) — the hero illustration's props and performance pose
MANDATORY PAGE CONTENT plus uppercase module labels (TURNAROUND / EXPRESSION GRID / DETAIL
GRID…) is the core pattern for design sheets — treat the layout as a requirements list and the
model delivers to spec.
Step 2: Three-Member Magazine Cover
With the character files locked in, you can produce the key visual. Move all three character descriptions into a single prompt, add the layout and text design, and generate three characters plus a complete magazine layout in one go:

The full prompt:
- Style (purple) — lighting, contrast, and lens effects all go up front
- Scene (orange) — content summary: magazine cover, 3:4, black background, oversized typography
- Characters (blue) — reuse the character files from Step 1, each with an added "position + pose"
- Detail (pink) —
TYPOGRAPHY:lists every piece of text to embed, then closes with the layout design
With multiple characters, write "who's in front, who's behind, who's cropped to what framing" into each character's own paragraph (dominates the center foreground / stands behind on the upper-left / lower-right and slightly farther back) — spell out the positions and the hierarchy stays solid.
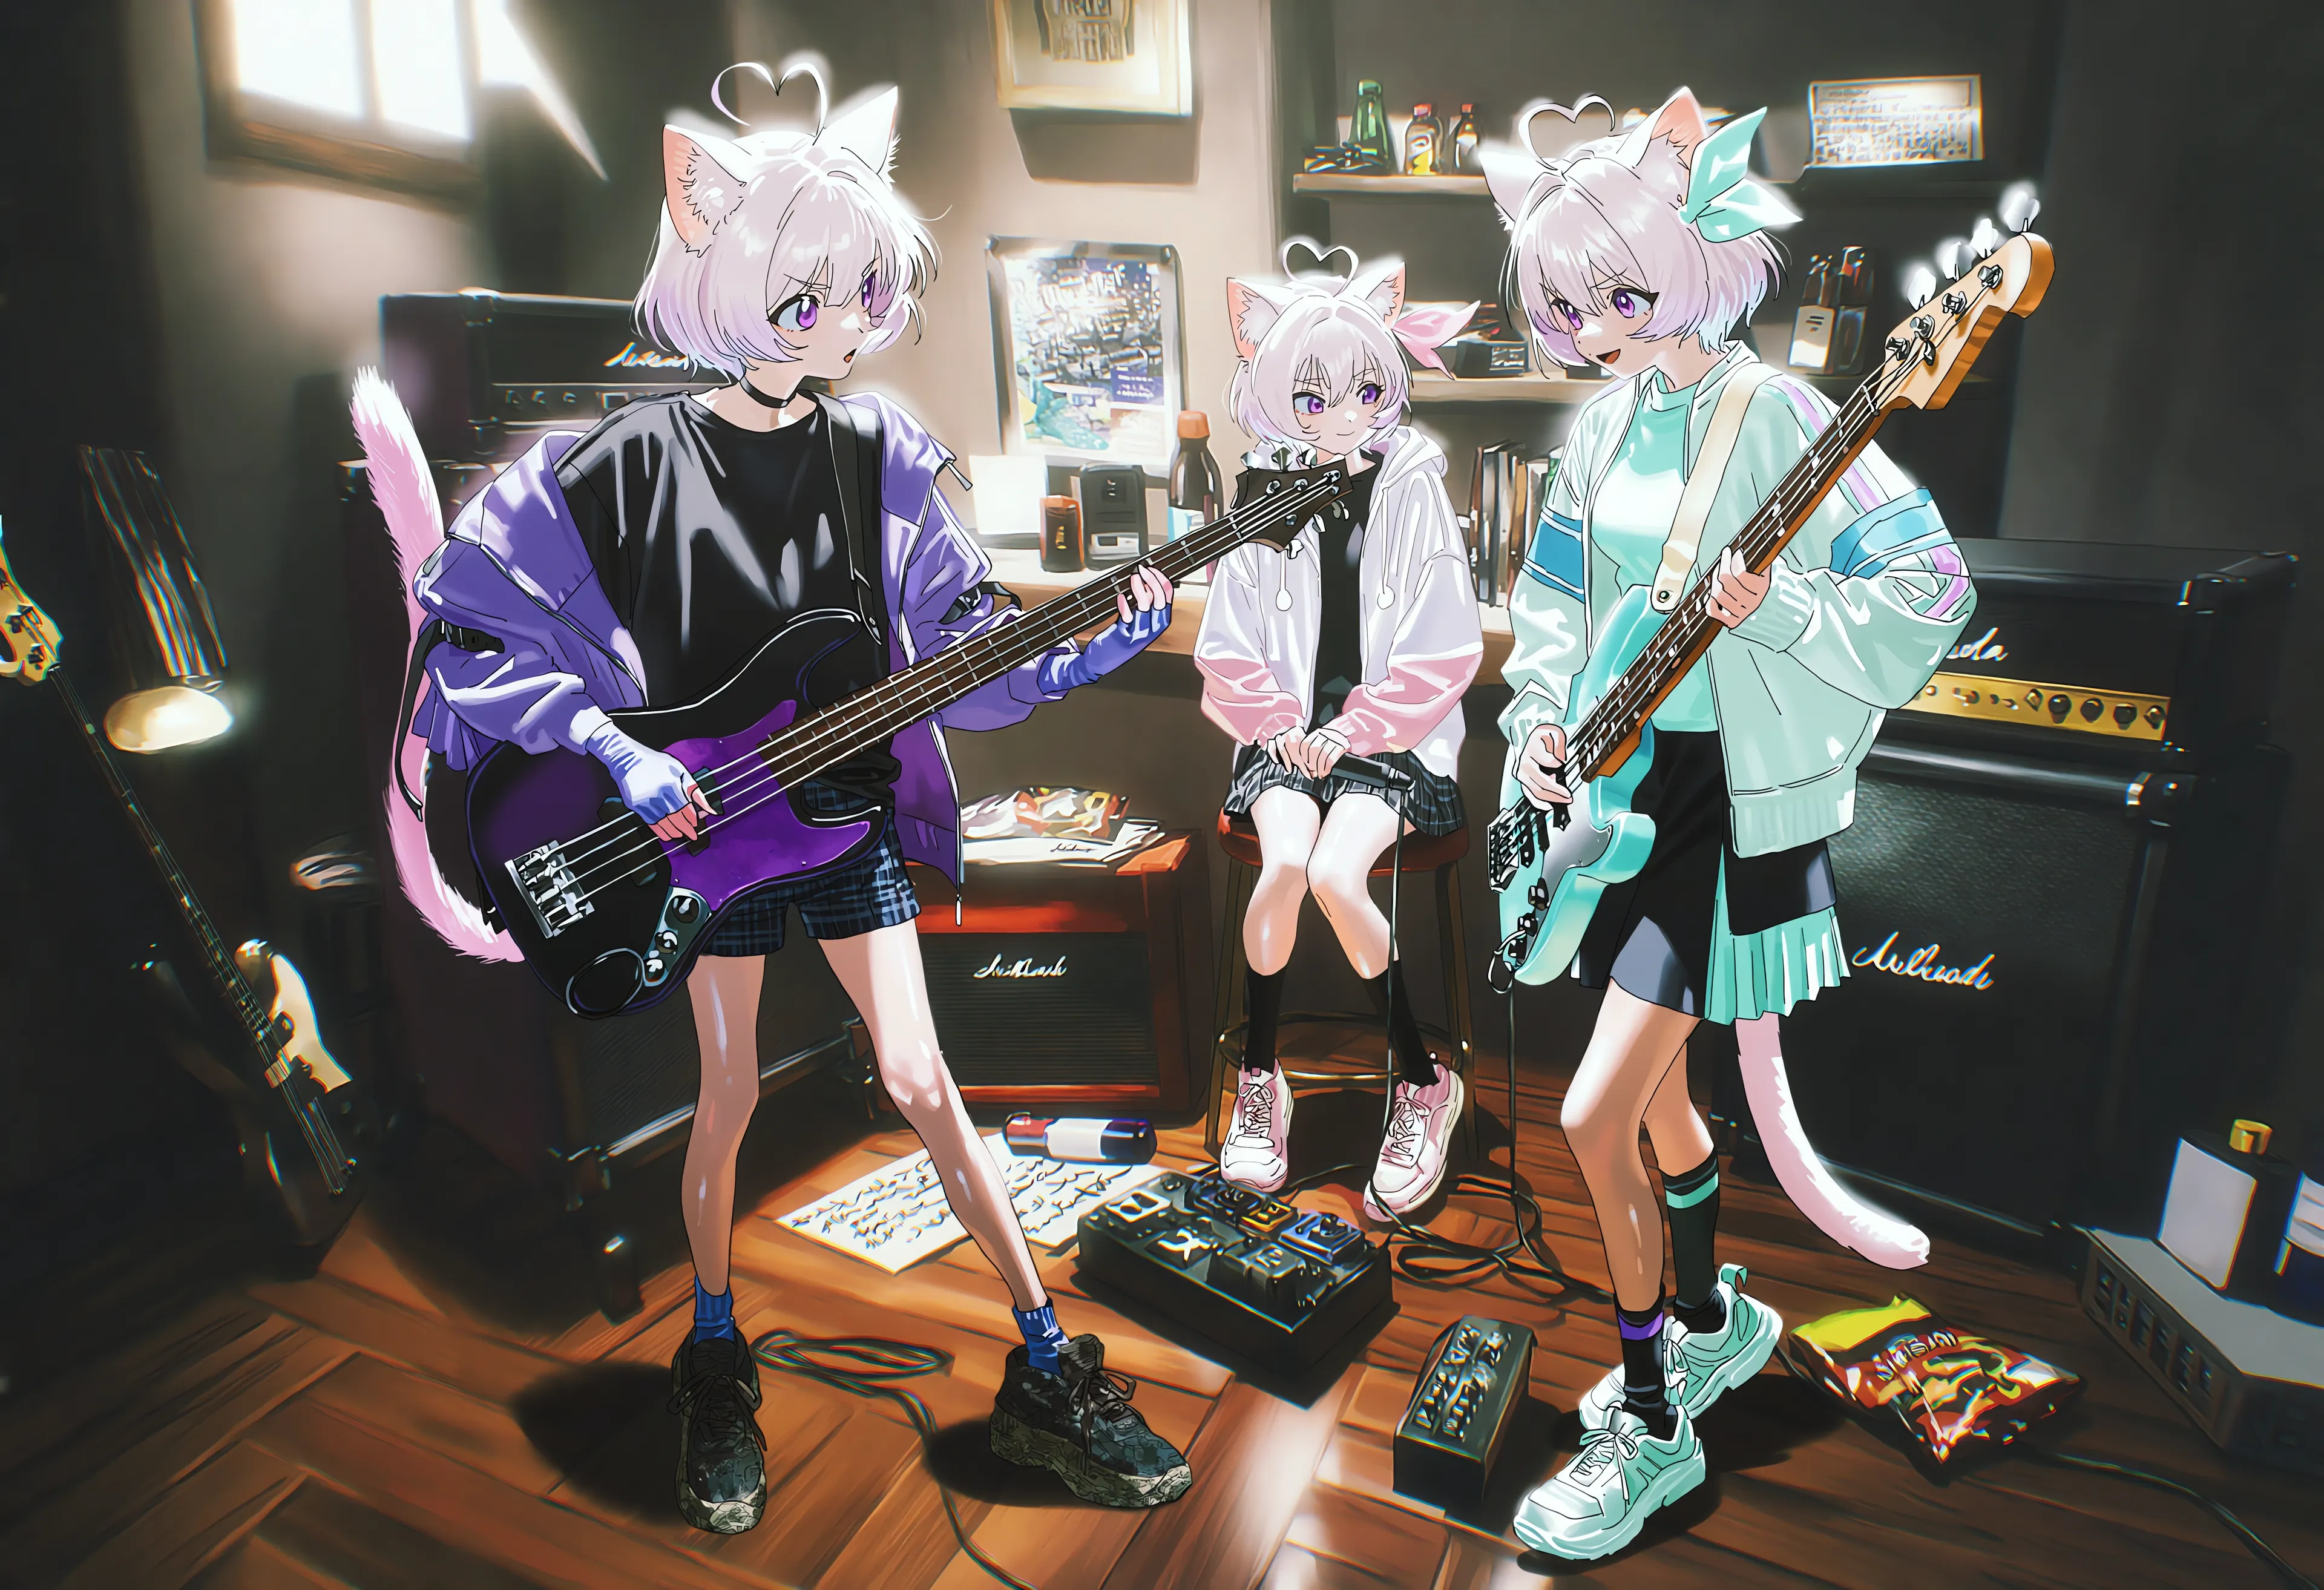
Step 3: Live CG
After the key visual come the application scenes. Carry the same character files over untouched, swap out the "style" and "content summary," change the poses to performance moves, and you get a live show:

The full prompt:
- Style (purple) — a CG scene pushes lighting all the way: chiaroscuro, crushed blacks, blown-out highlights
- Scene (orange) — concert chorus climax, low-angle audience viewpoint, shallow depth of field
- Characters (blue) — the trio's designs unchanged; rewrite the poses and the foreground/background focus relationship
- Mood (amber) — finish with stage lighting: three colored lights, gold confetti, glow sticks, haze
Keep the character files untouched and swap only the scene sections — consistency doesn't drop:

Step 4: Serialized Manga
With the characters and world established, serialization can begin. The 6-page color short "MIOのおうち日和" follows Mio's laid-back day at home:


Generated manga pages occasionally show skewed lettering or miswritten strokes. When the text looks off, don't reroll the whole page — use PixAI Edit Pro to fix just the text while the rest of the artwork stays intact:

Three things before generating manga: write each page's script first (AI can ghostwrite it if needed) → check every page's logic and continuity → only then convert the finalized script into prompts. Never reverse the order.
The short's full project brief looks like this — Genre: slice-of-life / healing / light comedy · Reading direction: right to left · Dialogue: Japanese · Setting: Mio's apartment (bedroom, living room, open kitchen) · Time: a weekend, late morning to early evening · Core theme: "A day where nothing happens can still be a very happy day."
The full six-page script follows, each page in the same fixed format of "page role → layout → panel-by-panel breakdown":
A manga-page prompt has two more sections than a single image; the recommended order is style → content summary → character description → setting (scene continuity) → panel layout → panel content. Taking page 2, "Hunger forces Mio out of bed," here's the script converted into a prompt:
For black-and-white manga, swap the style section for a version that emphasizes monochrome and screentones, and rewrite the character description in black-and-white terms:
The official team also recommends pairing it with this black-and-white manga Recipe for steadier line and screentone quality.
The 3-page monochrome short "After School, The Three of Us" follows student Mio and her friends after class:


Step 5: Anniversary Art
Long-running projects can also give the characters new outfits. The fourth-anniversary project designed three new looks for Mio, each delivered as a multi-pose sheet:


Taking Mio-z as the example — the same character repeated 6 times in one image, each pose with its own expression, with the layout and every single pose written as a checklist:

Next Steps
Tsubaki.3 Prompt Templates
Natural-language image editing, reference-image generation, and quality/style prompt blocks.
Tsubaki.3 Overview
Revisit the complete list of Tsubaki.3's capabilities.
Advanced Prompting
Weights, emphasis syntax, and other advanced techniques.
Was this page helpful?
🎁 Adopted valid suggestions earn a 5,000 Credit reward!
Tsubaki.3 Prompt Templates
A practical Tsubaki.3 handbook — natural-language image editing, reference-image generation examples, and reusable quality/style prompt building blocks.
Other PixAI Models
PixAI model overview and archive — compare Tsubaki.2, Haruka V2 and Reference Pro at a glance, with parameter and tool support for each.