Advanced Prompting
Advanced prompt techniques — composition thinking, layering control, lighting and depth-of-field description for more polished AI art.
Advanced prompt techniques for AI image generation — composition thinking, layering, and how to describe lighting and depth of field. Once you've worked through Prompt Basics, the next problem most people hit isn't "I don't know the tags" — it's "I don't have a picture in my head." This guide helps you build composition thinking and walks through how to iterate on an image until it lands. The Prompt Cheatsheet is always there when you need a quick tag lookup.
Different models interpret prompts differently and have different default styles, so all examples on this page use Tsubaki.2 as the model and were generated with the Prompt Helper turned off, so you see exactly what the raw prompt produces. If you're using a different model or have the Prompt Helper enabled, your results may vary.
How to Imagine the Image
Before you start writing, don't dive straight into details. Build a "world that makes sense" around the theme first.
The whole process boils down to answering three questions:
What's in this world (elements) → What's happening (action and change) → How much should the viewer see (shot type)
Example: Working from "Spring"
Step 1: Theme → Pick environmental elements ("what's in it")
Start from the theme and list the most evocative scene elements. "Spring" pulls up flowers and grass — that's the foundation, and it sets the emotional tone for the whole image.
Step 2: Environment → Derive the character's state ("what would a person do here")
How does the character fit into this environment? Since the scene is grass, sitting feels more natural than standing for a relaxed spring atmosphere. The action should follow naturally from the environment, not be invented in isolation.
Step 3: Add a change factor (make the image come alive)
Pure stillness reads as flat. Add wind as the change factor — wind makes flowers and grass move, and unifies the motion logic of the scene. Once there's wind, hair should move too, which leads to a more specific action: a hand catching strands of hair as they're blown back. Now the action isn't decoration — it's a logical response to the environment, and the character ties into the scene through cause and effect.
Step 4: Shot control → Decide the information ratio
If you want to convey "the openness of the grassy field," the environment needs room to breathe — go with a wide shot rather than letting the character fill the frame. This step is really about information allocation: how much environment vs. how much character do you want the viewer to see.

Build the image from the theme down: lock in the scene foundation first, then derive the character's state and action from the environment, add change factors to break the stillness, and use the shot type to control the information ratio.
How to Frame the Image
The core of framing is shot type — it sets the ratio of character to environment, and it's one of the most fundamental composition decisions you can make. Here are the common shot types.
| Shot type | Example | Notes |
|---|---|---|
| Unspecified |  | When you don't specify a shot, the model picks the framing it thinks fits best. |
| Medium Shot |  | Roughly waist-up, balancing character and environment. The most everyday, stable narrative angle — works for dialogue, interaction, or light emotional beats. |
| Cowboy Shot |  | A medium-shot variant that keeps room for body language while shifting focus toward the character. Good for "character state plus a bit of presence." |
| Wide Shot |  | The furthest framing — the character takes up little space and the environment dominates. The point isn't the person; it's where they are. Good for establishing setting and context. |
| Close Up |  | Environment recedes; the viewer's attention naturally lands on the character's expression, eyes, and gestures. |
| Choker Shot |  | Just the face, sometimes only part of it — the environment basically disappears. The job here isn't conveying information, it's amplifying emotion. Strong impact, but overuse kills your pacing. |
Orientation: Portrait vs. Landscape
Aspect ratio is part of composition too, and the right choice depends on what you're framing:
- Portrait — Best for character work. The vertical frame gives you room for a full head-to-toe figure and lets expressions and emotions read clearly.
- Landscape — Best for scene work. The horizontal frame fits more environment, horizons, and depth.
If the subject is a character → go portrait. If the subject is the scene → go landscape. Decide what you're really centering, then pick the ratio.
How to Improve the Image
Already generating, but the result doesn't match what you imagined? It's not always the model's fault — often the prompt is internally contradictory. The core loop for revising:
Set the mood → Spot conflicts → Adjust expression → Add details
Here we'll walk through the full revision flow with a cat-girl jigsaw puzzle example.
Step 1: Define the goal (what are you trying to express)
Lock in what this image is supposed to convey from the start — not "looks nice," but "what relationship, what emotion." Once the goal is clear, every later decision serves it.
This image is meant to capture the jirai-kei cat-girl placing a piece into a sailor cat-girl puzzle. The core intent: dreamy and storybook. With the tone set, try a few style presets that match it, then pick your favorite from the results.
| 1. Classic Anime | 2. Lucid Dreamy | 3. Luminous Impasto |
|---|---|---|
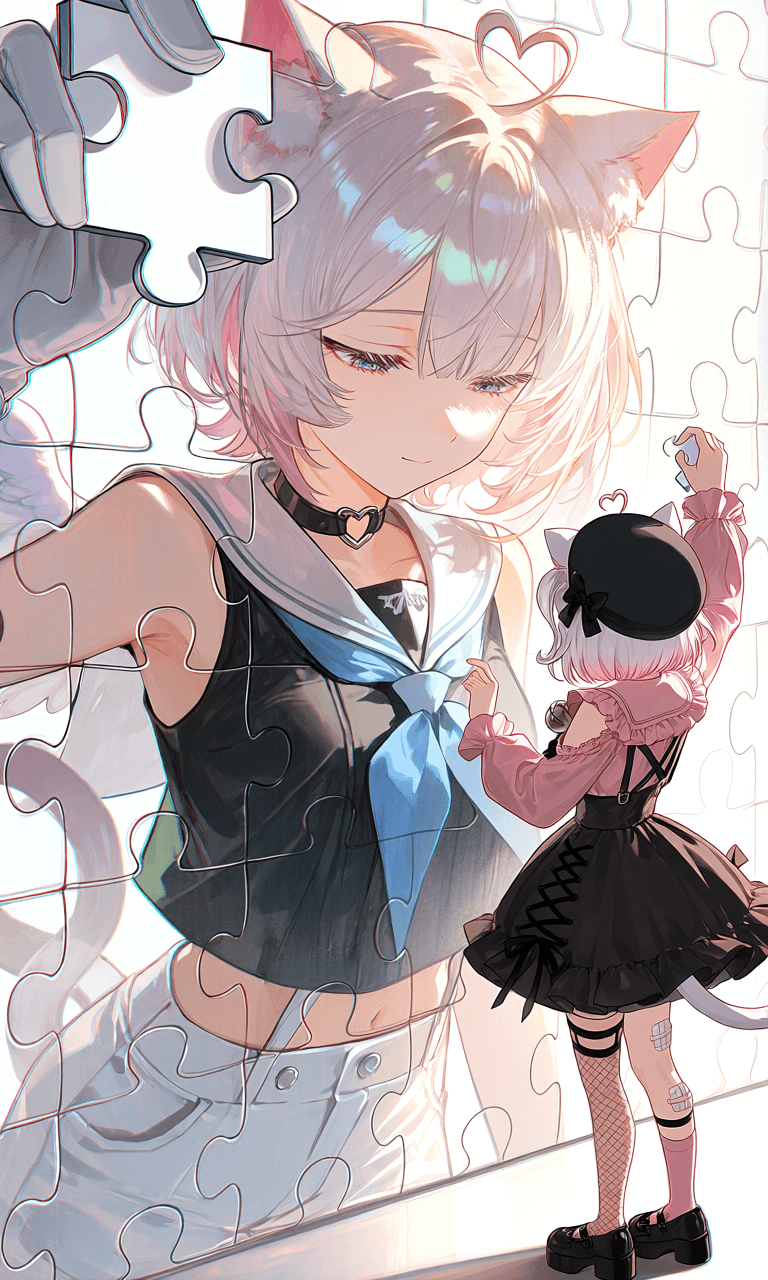 |  | 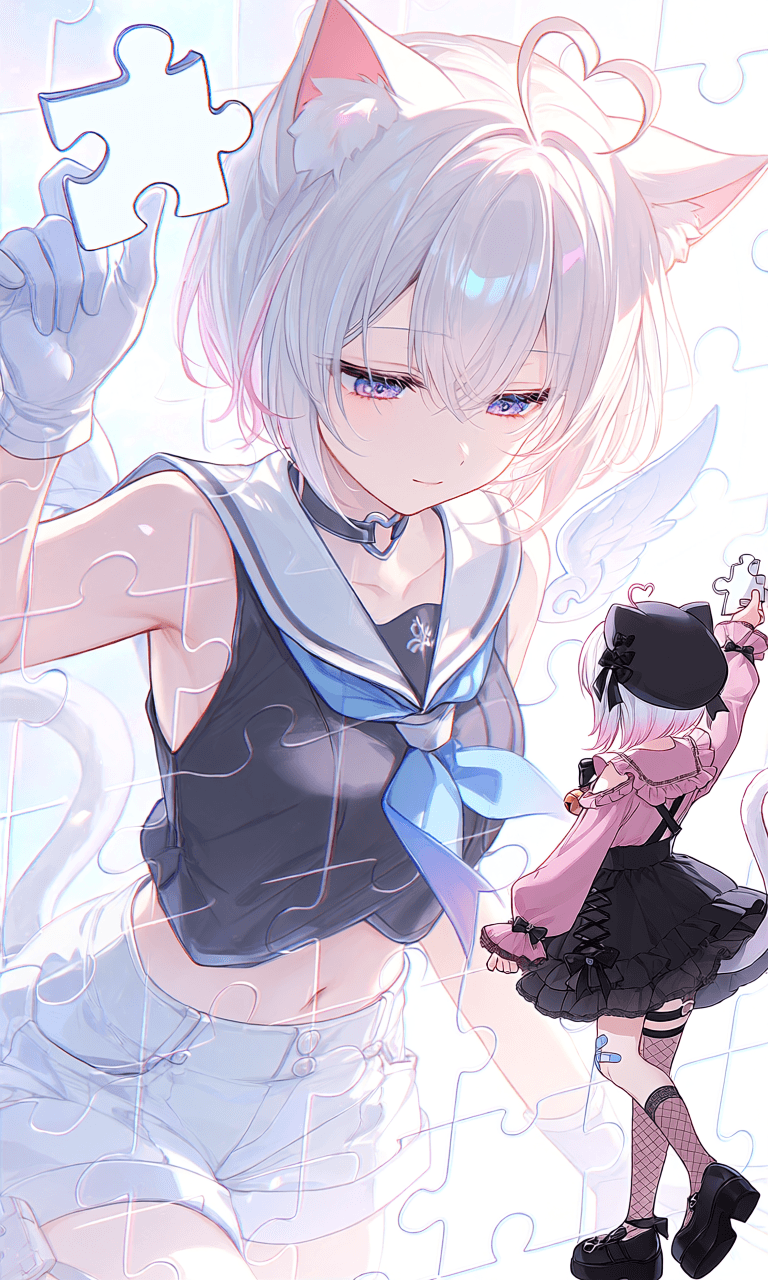 |
All three above use the same prompt — only the style preset changes.
Step 2: Spot conflicts (what's not working)
Most AI image problems aren't a model limitation — they're prompt settings clashing. Common conflict types:
- Shot vs. detail clash: You ask for both "face close-up" and "high heels"; the model has to fit both, so it ends up with a full-body shot instead
- Pose / direction contradiction: One person, but you've got both
standingandsitting— the model can read it as two people, or twist the pose into something weird - Leftover attributes: You change the dress to red by adding
red dressbut forget to remove the originalblue dress— now the AI doesn't know which one to render - Angle blocks emotion: You write
from sidebut still want a clear expression — the side profile naturally hides most of the face
The trick is finding what's contradicting in your prompt. Back to our puzzle example:
Conflict 1 (information clash): Too much of the sailor cat-girl's body is exposed — visually distracting.
Conflict 2 (composition clash): Saying the sailor cat-girl and jirai cat-girl "make eye contact" is too on-the-nose — there's no room left for the viewer's imagination.
Step 3: Adjust expression
Once you've spotted conflicts, the move isn't to just delete words — it's to change how you're expressing the same idea. Keep the feeling you wanted, but find an easier path to it.
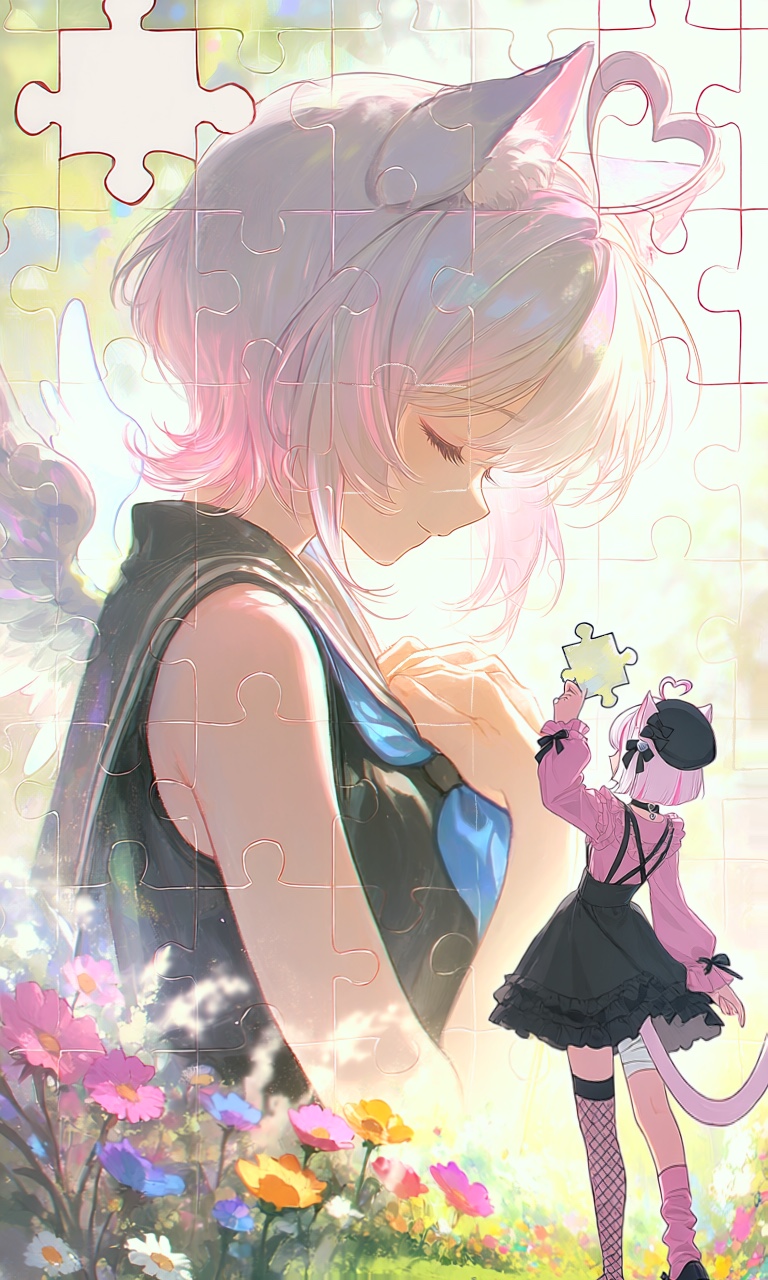
For Conflict 1: Remove the lower-body prompts (like white shorts) and emphasize upper body.
For Conflict 2: Borrow the cinematic introspective shot (where the character isn't engaging the outside world) — turn the sailor cat-girl fully sideways, close her eyes, and place her hands at her chest. The shift is from "spelling out the relationship" to "letting the atmosphere imply it."
AI image generation rewards photography knowledge! Concepts like shot type, composition, and lighting direction give you much tighter control over the result.
Step 4: Reinforce the expression
Once the structure is solid, layer in details to push the image further. Pile on details too early and they'll mask structural problems instead of fixing them.
To preserve the storybook tone, we add flowers and plants to the background. But they end up too prominent — the frame is overstuffed with no breathing room. Adding soft bokeh effect blurs the background and makes the lighting softer. upper body and blurry background redistribute the attention, keeping the visual center on the character and the emotion.
Compared to the initial Step 1 prompt, the final version makes targeted adjustments at every layer. The final result:
Was this page helpful?
🎁 Adopted valid suggestions earn a 5,000 Credit reward!