Model Parameters
How to dial in AI image generation parameters — a full breakdown of aspect ratio, sampling steps, CFG Scale, Seed, VAE, and every other setting.
How do you dial in AI image generation? This page walks through every setting on the generation panel — aspect ratio, resolution, sampling steps, CFG Scale, Seed, VAE, reference images, and more, plus what they do and recommended values. Different models support different parameters, so check the comparison in Model Overview. Want to understand the principles behind these parameters first? Read "How Image Generation Works" below, or revisit How AI Image Generation Works.
How Image Generation Works (Quick Intro)
The core of AI image generation is the diffusion model. In simple terms, the process has two phases:
- Adding noise — start with a clean image and gradually add random noise until it becomes pure visual static
- Removing noise — go in reverse, starting from random noise and step by step, guided by your prompt, recovering a meaningful image
The parameters you adjust on the generation panel are essentially controls for different parts of this denoising process.
- Prompts tell the AI "which direction to denoise toward" — what to draw
- Sampling steps decide "how many denoising steps to take" — more steps means richer detail
- Sampler decides "how each step moves" — different algorithms produce different styles
- CFG Scale decides "how strictly to follow the prompt" — higher means stricter adherence
- Seed decides "which noise pattern to start from" — fix the seed and you can reproduce similar results
Once you grasp this, the role of each parameter below makes a lot more sense.
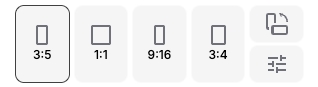
Aspect Ratio
Aspect ratio determines the shape of your output. PixAI offers presets like 3:5, 1:1, 9:16, and 3:4. You can also set a custom aspect ratio manually.
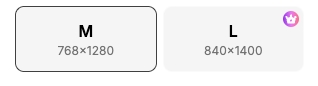
Resolution
Once you've picked an aspect ratio, you can choose the resolution. Higher resolution means richer detail but uses more credits. Members can unlock higher resolution options.
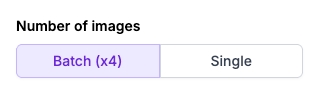
Batch Size
Controls how many images get generated at once.
- Single — generate 1 image
- Multiple (×4) — generate 4 images at once with a 50% discount (you pay the cost of 2 images)
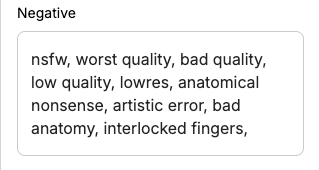
Negative Prompts
Negative prompts tell the AI not to put certain things in the image. PixAI's models all come with built-in default negative prompts that work well in most cases. For full breakdowns by category, writing tips, and example scenarios, see Prompt Basics → Negative Prompts.
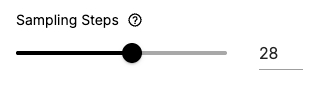
Sampling Steps
Steps determine how many iteration rounds the AI spends on a single image. More steps means richer detail but uses more credits. PixAI's models typically default to 28.

Sampler
The sampler is the algorithm the AI uses to recover an image from noise. Different samplers affect the visual style and convergence speed. Default: Euler a.
- Euler a (default) — good for exploration and randomness
- DPM++ 2M Karras — community favorite, sharp images with rich detail
- DDIM — fast convergence, stable, suitable for inpainting
Karras variants (the ones with "Karras" in the name) are usually sharper with better contrast than the standard versions.
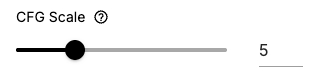
CFG Scale
Controls how strictly the AI follows your prompt. Higher values stick closer to the prompt but may oversaturate the image. Default: 5.
| CFG value | Effect |
|---|---|
| 3–4 | Loose interpretation |
| 5 | Balanced (default) |
| 6–7 | Strict adherence |
Seed
The seed determines the random starting point for generation. Fix the seed to get similar results across runs.
- Fixed seed: same seed + same settings → identical results
- Use case: once you find an image you like, lock the seed and tweak other parameters to see exactly what each change does
- Every generated image shows its seed value, so you can record and reproduce it later
VAE Model
The VAE (Variational Autoencoder) handles the final color and contrast rendering pass. It doesn't affect composition — only color tone. DiT models (like the Tsubaki series) use a built-in VAE that can't be changed.
| VAE | Color characteristics | Best for |
|---|---|---|
| Default | Depends on the model | Safest choice |
| Liquid9745VAE | Vivid and saturated | Fantasy, color-rich scenes |
| PPPAnimix VAE | Clean and balanced | Anime, character portraits |
| SharpSpectrumVAEXL | Sharp and high-contrast | Detail-heavy scenes |

Reference Image
Upload a reference image and the AI will create on top of it. The Strength parameter controls how much the AI changes the original. For editing models (Reference Pro), the reference image is the core feature — you must upload at least one image to use it.
- Low Strength (0.1–0.3) — fine-tune, mostly preserves the original
- Medium Strength (0.3–0.5) — style transfer, partial refinement
- High Strength (0.5–0.7) — sketch to finished piece
Was this page helpful?
🎁 Adopted valid suggestions earn a 5,000 Credit reward!
Reference Pro
Meet PixAI Reference Pro — multi-image reference, natural language editing, and 4K high-resolution output in a single editing model.
LoRA Basics
A LoRA primer — what LoRAs are, how to add them to a model, how to tune weights, and everything you need to know about AI art's go-to style add-on.